
How to Localize Your Mobile App with IP Geolocation API in React Native
Mobile app developers must cater to a diverse global audience as the world becomes increasingly interconnected. One of the most effective ways to achieve this is through app localization. Localization can significantly enhance user engagement and improve the overall user experience. Geolocation is a crucial aspect of app localization – determining a user's geographical location. We can achieve it using IP location API. One example of IP geolocation API is IPstack.
In this blog, we will explore how to harness the potential of IP geolocation APIs in a React Native app to offer personalized experiences to users worldwide. We'll start by delving into what IP geolocation entails and how it works. Moreover, we'll discuss the factors to consider while selecting an IP location API that best suits our app's requirements.
With the groundwork laid, we will move on to the practical side. Setting up a React Native project and integrating the chosen IP geolocation API will be our next steps. Furthermore, we'll demonstrate how to fetch location data and modify the app's content through clear, step-by-step instructions. Of course, no project is without its challenges. Therefore, we'll cover testing and debugging techniques to ensure a smooth localization experience.
Finally, we'll provide essential instructions and best practices, empowering developers to implement IP geolocation effectively and responsibly. Let's begin.

What is IP Geolocation, and How it Works?
IP geolocation is a technique used to determine the geographic location of a device or user by analyzing their IP (Internet Protocol) address. Every device connected to the internet is assigned a unique IP address. Furthermore, it serves as a digital identifier for that device. IP geolocation utilizes this information to approximate the device's physical location, often at the city or neighborhood level.
The process of IP geolocation involves the following steps:
When a user or device accesses the Internet, it is assigned an IP address by the Internet Service Provider (ISP). This IP address is linked to a specific geographic region based on the ISP's allocation and registration data.
Various organizations maintain extensive databases associating IP address ranges with corresponding geographical locations. These databases are compiled through various methods.
When we request a device or user, the IP address is sent along with the request. The web server or application then extracts the IP address and queries the IP geolocation database to determine the associated location.
The IP geolocation service uses the retrieved data to estimate the device's or user's physical location. It may provide information about the country, region, city, latitude, and longitude.

How to Choose the Right IP Geolocation API?
When choosing the right IP geolocation API for your mobile app in React Native, you must consider the following factors.
Firstly, accuracy is paramount. Look for APIs with a reputation for high precision in geolocation data. Test the API's accuracy with sample IP addresses to verify its performance.
Secondly, consider the coverage provided by the API. Some APIs might have extensive coverage in specific regions but be limited in others. Opt for an API with comprehensive global coverage to cater to a wider audience.
Next, examine the API's performance and response time. A fast and reliable API will ensure a seamless user experience within your app.
Another crucial factor is the API's ease of integration. Look for documentation, code samples, and client libraries that simplify the integration process.
Lastly, pricing and scalability are essential considerations. Choose an API with a pricing model that aligns with your app's needs and growth potential.

IPstack
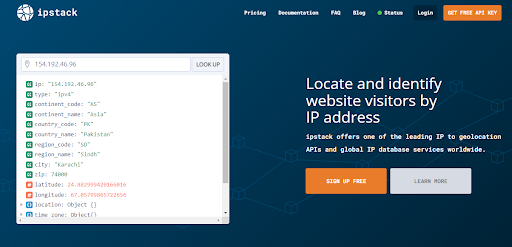
IPstack is an IP geolocation API. It provides real-time and precise location information for your website visitors. You can download this data in JSON or XML format for quick review and processing.
Utilizing Ipstack offers numerous advantages. Firstly, it enhances security by efficiently detecting threats from risky IP addresses. The swift identification of rogue addresses helps safeguard your site from potential harm.
Beyond security, IPstack enables you to customize your visitors' experience based on location. For instance, you can detect a user's country and change language settings accordingly. Alternatively, depending on the user's region, you may prioritize slightly different content on your website.
To get started with IPstack, you can access a free API key. Simply head to the IPstack homepage and click on the "Get Free API Key" button. Signing up for a free account requires only your email address and a password; no payment information is needed for the free plan. Upon registration, you'll receive a Quickstart page with your API key. You must keep it safe to access the service.
Now that you got your API key let's create an app with localization functionalities. We will use React Native with IPstack.
How to Perform Mobile App Localization Using React Native & IPstack?
Here are the steps that you must follow:
Setting Up a React Native Project
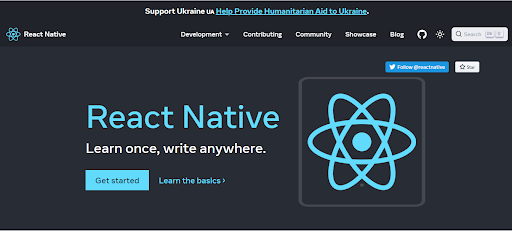
Visit https://reactnative.dev/ and click on the Get Started button.
Expo Go offers the most straightforward way to begin for newcomers to mobile development. Expo is a comprehensive set of tools and services centered around React Native. Moreover, it features its ability to have you write a React Native app in just a few minutes. You'll need a recent Node.js version and a phone or emulator. If you prefer trying React Native directly in your web browser before downloading any tools, you can experiment with Snack.
For those already well-versed in mobile development, using React Native CLI might be more suitable. This method necessitates using Xcode or Android Studio to initiate the process. If you already have either of these tools installed, you can get up and running within a few minutes. However, if you haven't installed them, expect to spend approximately an hour installing and configuring them.
We will go with the first option.
Expo Go Quickstart
Follow these steps to create and modify your first React Native app.
Run the commands below to create the new React Native project.
npx create-expo-app AwesomeProject
cd AwesomeProject
Next, start the development server by running
npx expo start
This will initiate the development server for you.
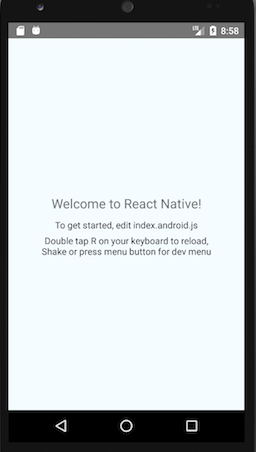
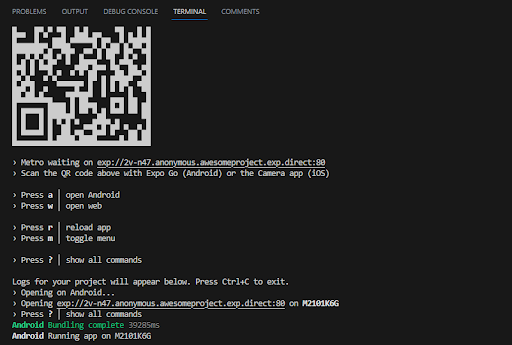
To run your React Native application, install the Expo Go app on your iOS or Android phone. Connect your phone to the same wireless network as your computer. Use the Expo Go app to scan the QR code displayed in your terminal for Android. This will open your project. For iOS, use the default iOS Camera app's built-in QR code scanner to scan the QR code from the terminal.
Once you have successfully run the app, you can modify it. Open "App.js" in your preferred text editor and make the desired changes. The application will automatically reload once you save your edits.
Modifying Our Project.
Open your project and then the App.js file in Visual Studio Code and follow the steps given below:
Step 1: Import required modules and packages
import React, { useState, useEffect } from 'react';
import { StatusBar } from 'expo-status-bar';
import { StyleSheet, Text, View, ImageBackground, TouchableOpacity, Clipboard, Linking } from 'react-native';
import { FontAwesome, FontAwesome5 } from 'react-native-vector-icons'; // Import the icons
import axios from 'axios'; // Import axios
The code imports various modules and components from `react`, `react-native`, and other packages. It imports `useState` and `useEffect` hooks from `react` for managing state and performing side effects. Then, it imports `StatusBar` from `expo-status-bar` to customize the status bar appearance in the app.
Next, we import UI components such as `View`, `Text`, `ImageBackground`, and `TouchableOpacity` from `react-native` to build the app's user interface. The code also imports icon components `FontAwesome` and `FontAwesome5` from `react-native-vector-icons` to use font icons in the app. Finally, it imports `axios` to request HTTP to fetch location data.
Step 2: Define constants for IPstack API and continent colors
const ipstackApiKey = '9ce8b397770fc47a4d764a3de74cd8c6';
const continentColors = {
Asia: '#ffa500',
Europe: '#D0A7A7',
Africa: '#5733FF',
NorthAmerica: '#48D1CC',
SouthAmerica: '#33FF57',
Oceania: '#5733FF',
Antarctica: '#FFFF33',
};
`ipstackApiKey` stores the API key for the IPstack API that fetches location data.
`continentColors` is an object that maps continent names to specific colors. This color mapping highlights the continent in the UI based on the fetched location.
Step 3: Define the `Clock` component
const Clock = ({ location }) => {
const [currentTime, setCurrentTime] = useState(new Date());
useEffect(() => {
const interval = setInterval(() => {
setCurrentTime(new Date());
}, 5000);
return () => clearInterval(interval);
}, []);
return (
<TouchableOpacity style={styles.clockButton}>
<FontAwesome name="clock-o" size={24} color="white" /;>
<Text style={styles.clockButtonText}>
{currentTime.toLocaleTimeString()} at {location.locationString}
</Text>
</TouchableOpacity>
);
};
The `Clock` component displays the current time and the fetched location. Moreover, It uses the `useState` hook to manage the `currentTime` state, which holds the current time as a `Date` object. Furthermore, The `useEffect` hook updates the `currentTime` state every 5 seconds. Additionally, the component renders a `TouchableOpacity` containing a clock icon and the current time with the fetched location.

Step 4: Define the main `App` component
export default function App() {
const [location, setLocation] = useState(null);
const [imageUrl, setImageUrl] = useState(
'https://www.strattic.com/wp-content/uploads/2021/05/ipstack.png'
);
The `App` component is the main entry point and renders the user interface. Moreover, it uses the `useState` hook to manage two states: `location` and `imageUrl`. Furthermore, `location` holds the fetched location data, including the location string, continent name, latitude, longitude, and continent color. Additionally, `imageUrl` holds the URL of the image used as the background for the app.
Step 5: Continue defining the main `App` component
const handleImageUrlChange = (url) => {
setImageUrl(url);
};
const fetchLocation = async () => {
try {
const response = await axios.get(
`http://api.ipstack.com/check?access_key=${ipstackApiKey}`
);
const { city, region_name, country_name, continent_name, latitude, longitude } = response.data;
const locationString = `${city}, ${region_name}, ${country_name}`;
const continentColor = continentColors[continent_name] || '#FFFFFF';
setLocation({ locationString, continent_name, latitude, longitude, continentColor });
} catch (error) {
console.error('Error fetching location:', error);
}
};
`handleImageUrlChange` is a function that updates the `imageUrl` state with a new URL passed as an argument. However, it is not currently used in the code provided. Furthermore, `fetchLocation` is an asynchronous function that fetches the location data from the IPstack API using `Axios`. Moreover, it makes a GET request to `http://api.ipstack.com/check` with the provided `ipstackApiKey.`
The response data extracts relevant location information. Moreover, the `locationString` is created by combining the city, region_name, and country_name. At the same time, `continentColor` is determined based on the continent_name using the `continentColors` object. Finally, the fetched location data is stored in the `location` state using `setLocation.`
Step 6: Continue defining the main `App` component
const getLocation = () => {
fetchLocation();
};
const copyLocationToClipboard = () => {
if (location) {
const { locationString } = location;
Clipboard.setString(locationString);
alert('Location information copied to clipboard!');
}
};
`getLocation` is a function that calls the `fetchLocation` function to fetch the location data and update the `location` state with the result. Furthermore, `copyLocationToClipboard` is a function that copies the `locationString` to the clipboard if `location` is available. Besides, it uses the `Clipboard` API from `react-native` to copy.
Step 7: Continue defining the main `App` component
const openSocialMedia = (url) => {
Linking.openURL(url).catch((err) => console.error('Error opening URL:', err));
};
useEffect(() => {
getLocation();
}, []);
`openSocialMedia` is a function that takes a URL as an argument. Then, it attempts to open the URL in the device's default web browser using the `Linking` API from `react-native.` Furthermore, `useEffect` is used to call `getLocation` when the component mounts. This ensures the location data is fetched and displayed when the app starts.
Step 8: Continue defining the main `App` component
return (
<View style={styles.container}>
<ImageBackground source={{ uri: imageUrl }} style={styles.backgroundImage} blurRadius={3}>
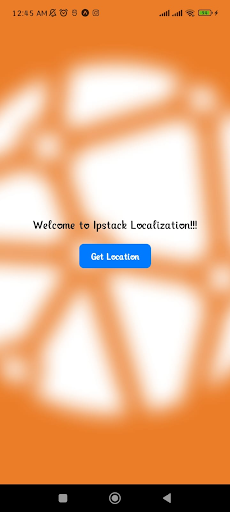
<Text style={styles.locationText}>Welcome to IPstack Localization!!!</Text>
<TouchableOpacity style={styles.getLocationButton} onPress={getLocation}>
<Text style={styles.buttonText}>Get Location</Text>
</TouchableOpacity>
The `return` statement starts rendering the main `App` component. Moreover, it renders a `View` component with the styles defined in the `styles.container`. Furthermore, inside the `View,` an `ImageBackground` component displays the background image from the `imageUrl` state with a slight blur effect.
Step 9: Continue defining the main `App` component
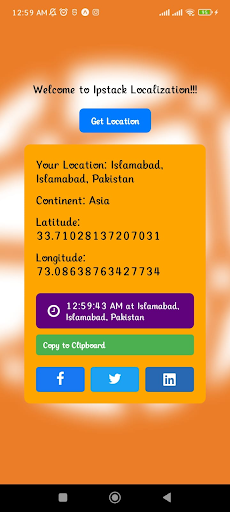
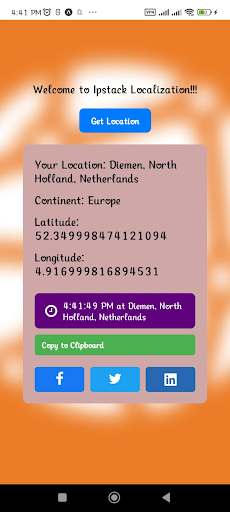
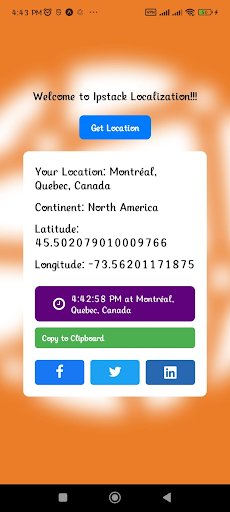
{location ? (
<View style={[styles.infoContainer, { backgroundColor: location.continentColor }]}>
<Text style={styles.locationText}>Your Location: {location.locationString}</Text>
<Text style={styles.locationText}>Continent: {location.continent_name}</Text>
<Text style={styles.locationText}>Latitude: {location.latitude}</Text>
<Text style={styles.locationText}>Longitude: {location.longitude}</Text>
{/* Display the clock */}
<Clock location={location} />
<TouchableOpacity style={styles.copyButton} onPress={copyLocationToClipboard}>
<Text style={styles.copyButtonText}>Copy to Clipboard</Text>
</TouchableOpacity>
If the `location` state is available, it renders components to display the fetched location information.

Step 10: Continue defining the main `App` component
<View style={styles.socialMediaButtons}>
<TouchableOpacity
style={[styles.socialMediaButton, { backgroundColor: '#1877F2' }]}
onPress={() => openSocialMedia('https://www.facebook.com/')}>
<FontAwesome name="facebook" size={24} color="white" />
</TouchableOpacity>
<View style={styles.buttonSpacer} />
<TouchableOpacity
style={[styles.socialMediaButton, { backgroundColor: '#1DA1F2' }]}
onPress={() => openSocialMedia('https://twitter.com/')}>
<FontAwesome name="twitter" size={24} color="white" />
</TouchableOpacity>
<View style={styles.buttonSpacer} />
<TouchableOpacity
style={[styles.socialMediaButton, { backgroundColor: '#2867B2' }]}
onPress={() => openSocialMedia('https://www.linkedin.com/')}>
<FontAwesome5 name="linkedin" size={24} color="white" />
</TouchableOpacity>
</View>
</View>
) : null}
Inside the condition, it renders components that display the fetched location information. Then, The `Clock` component renders passing the `location` state as a prop to display the current time with the fetched location. Furthermore, it renders three `TouchableOpacity` components, each representing a social media button with a specific background color (Facebook, Twitter, and LinkedIn).
Besides, each button has an `onPress` handler that opens the corresponding social media URL in the device's default web browser.
Step 11: Continue defining the main `App` component
</ImageBackground>
<StatusBar style="auto" />
</View>
);
}
const styles = StyleSheet.create({
container: {
flex: 1,
alignItems: 'center',
justifyContent: 'center',
},
backgroundImage: {
flex: 1,
resizeMode: 'cover',
justifyContent: 'center',
alignItems: 'center',
width: '100%',
height: '100%',
},
infoContainer: {
padding: 20,
borderRadius: 10,
maxWidth: '80%',
marginTop: 20,
},
locationText: {
fontSize: 20,
marginBottom: 10,
color: 'black',
},
getLocationButton: {
backgroundColor: '#007AFF',
paddingVertical: 10,
paddingHorizontal: 20,
borderRadius: 8,
marginTop: 10,
},
buttonText: {
color: 'white',
fontSize: 16,
fontWeight: 'bold',
},
copyButton: {
backgroundColor: '#4CAF50',
paddingVertical: 8,
paddingHorizontal: 12,
borderRadius: 5,
marginTop: 10,
},
copyButtonText: {
color: 'white',
fontSize: 14,
fontWeight: 'bold',
},
socialMediaButtons: {
flexDirection: 'row',
justifyContent: 'space-between',
marginTop: 20,
},
socialMediaButton: {
flex: 1,
paddingVertical: 8,
paddingHorizontal: 12,
borderRadius: 5,
alignItems: 'center',
},
buttonSpacer: {
width: 10, // Adjust the spacing as needed
},
clockButton: {
flexDirection: 'row',
alignItems: 'center',
justifyContent: 'center',
paddingVertical: 10,
paddingHorizontal: 20,
borderRadius: 8,
backgroundColor: '#5F027C',
marginTop: 15,
},
clockButtonText: {
color: 'white',
fontSize: 16,
marginLeft: 10,
},
});
The `ImageBackground` component is closed here. Next, the `StatusBar` component from `expo-status-bar` customizes the status bar appearance. Furthermore, the `styles` object contains various styles for different UI components used in the app.
Testing and Debugging
Now that we have completed the code-writing process, we must run it on an emulator or a physical device. You should install the Expo Go application on your mobile to run it. Once you install the app, you must connect your device to your laptop using a data cable. Make sure you turn on the File Transfer option when establishing a connection between your laptop and mobile.
Then, start Metro in the Visual Studio Code terminal by running the command "npm start." Once the terminal starts, you will get a window like the one below. Open it on Android, and it will show you the outputs. In the output images, you can see how the color changes for different continents.
Output

Important Instructions
Make sure that you have a valid API key for IPstack
Verify if both the mobile and computer are connected to the same network.
To check the IP address assigned to the computer by the router, open the command prompt (CMD) and type "ipconfig." The result will display various network information, including the IPv4 Address, which should match the connected Wi-Fi network.
Set the network to a private/home network. On Windows 10, you can do this by clicking on the taskbar Wi-Fi icon, selecting the properties of the connected network, and under Network profile, choose "private."
Ensure that the firewall is disabled. If the firewall is enabled, please turn it off temporarily during the test. Remember to turn it back on after completing your task.
Conclusion
Localizing your mobile app using IP Geolocation API in React Native can greatly enhance the user experience. Moreover, it helps deliver personalized content and services based on the user's location. Furthermore, this powerful tool allows developers to identify users' geographical locations efficiently. Hence, enabling targeted content, language adaptation, and location-specific functionalities increases user engagement and satisfaction. Implementing IP Geolocation API in React Native is a practical and effective approach to global app localization.

FAQs
What Is IP Geolocation API?
IP Geolocation API is a service that identifies a user's geographical location based on their IP address.
Is the Geolocation API Free?
The Geolocation API is generally free, but some providers may have usage limitations or premium features.
What Is the Best IP Geolocation API?
The best IP Geolocation API depends on specific project requirements and budget constraints. Some popular options include MaxMind, IPstack, and ipinfo.io.
How Do I Find Geolocation From IP?
To find geolocation from an IP address, use an IP Geolocation API service or database lookup for location data.